⚠️ This article is outdated and discontinued since Heroku decided to no longer offer their free tiers as this article series suggests to use in August, 2022. Please see this post for details. ⚠️
In the previous part of this series, I introduced the overall idea about what we are trying to achieve and what’s the goal of it.
Today I will show you how to register and prepare your Bot using the Telegram app.
To follow this part, you will need to have Telegram installed and signed up for an account already. Also, you will need to have your mobile at hand where the app is installed on.
The first steps
Before we can start to write the Django and Python part, we need to register the Telegram Bot. Since there are different operation modes for bots, we can start to configure and using this bot to have messages sent to it immediately, without having a consumer of these messages prepared.
The BotFather

In Telegram, you are creating new bots by simply talking to another bot; called: BotFather. This bot is there to create new bots and change settings for existing ones. To start a conversation with this bot, just navigate to https://telegram.me/botfather on your mobile and a new conversation will open in Telegram.
This dialogue looks a bit different from other conversations at first, but once this conversation is started, you can talk to the bot just like with any real person; simply type your messages.
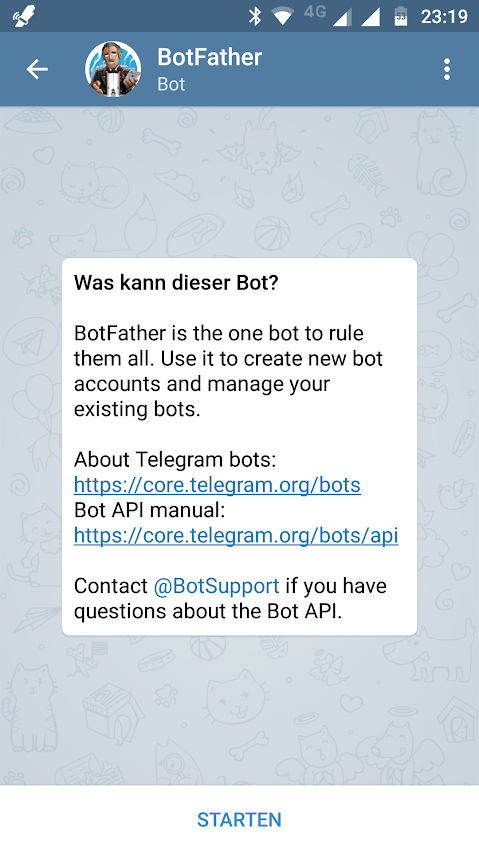
When you are redirected to Telegram after you have opened the BotFather-link, you are presented a screen which pretty much looks like this:

Most certainly, the German texts are in your own language, but that should be self-explanatory.
To begin a conversation, hit “START” (or whatever your locale translates this to). You will notice that this results in a text “/start” to be sent to the Bot. This is a command. Even though you can have your own Bots to react on any string, it is a convention that strings which are beginning with “/” are always considered to be commands.
Immediately after that “/start” was sent, the Bot will answer with an overview of available commands. You do not need to authenticate with it or “login” or anything; the Bot recognizes you already since your user-id is automatically known to any conversation partner on Telegram and is taken to identify you unambiguously.
Go on, play around with it; have a good talk. You can write anything you like to it. You can even send some pictures or similar; if the bot doesn’t understand you, you are just presented the initial usage overview once more. So do not be shy or afraid to break something; as long as you have never registered a Bot before, nothing can go wrong. Take your time, make yourself familiar with it a bit. Once you are done, we will continue to register our first bot.
Register your bot
To send the commands from the overview BotFather sent you, you may type them yourself or simply type on them in the BotFather’s message. If you look carefully, you might notice the command names are blue. That’s because they are some kind of clickable links, writing them when touched.
Continue creating your bot by typing or touching the command “/newbot”. The BotFather will guide you through this process and asks:
Alright, a new bot. How are we going to call it? Please choose a name for your bot.
You can choose whatever you want here; this is just a name, like “Marc Richter” is mine, not a username. This is just a “human readable” name and doesn’t need to be unique.
Simply write a name in reply to this question and send it. As you see: This is just like with any normal conversation with a human being and quite self-explanatory, since the bot guides you well.
Next, it asks you for a username:
Good. Now let’s choose a username for your bot. It must end in “bot”.
Like this for example: TetrisBot or tetris_bot.
As you can see, the trailing letters “bot” must not be all lowercase characters. But it has to be these three trailing characters. This is to unmistakeable identify bots (Yes, “BotFather” is a bad example of this).
Also, what you choose here must be unique. If you choose something too common like “mybot” or similar, chances are that BotFather replies:
Sorry, this username is already taken. Please try something different.
I’ve decided for “demo76812bot” to ensure, this is still available. Since you and the users of this bot might need to type this name initially, you should aim for something handier than this.
If everything worked well, you get a longer message sharing some details on your new bot:
Done! Congratulations on your new bot. You will find it at t.me/demo76812bot. You can now add a description, about section and profile picture for your bot, see /help for a list of commands. By the way, when you’ve finished creating your cool bot, ping our Bot Support if you want a better username for it. Just make sure the bot is fully operational before you do this.
Use this token to access the HTTP API:
767070664:AAGCbn….For a description of the Bot API, see this page: https://core.telegram.org/bots/api

Please make sure to take a note of the token. If you lose it, you can generate a new one, using the /token command, but you will need this in the next sections of this series. Also, the token is to be considered a secret, just like a password is. Please make sure to not expose it anywhere; not in a forum, nor in anything which hit’s a Git repo or something.
You may now play around with it a bit, add a profile photo (“/setuserpic“) or a description (“/setdescription“) or whatever you like; what is necessary to proceed has been done already. To learn how to interact with your bot, please continue with this guide.
Write something to your bot
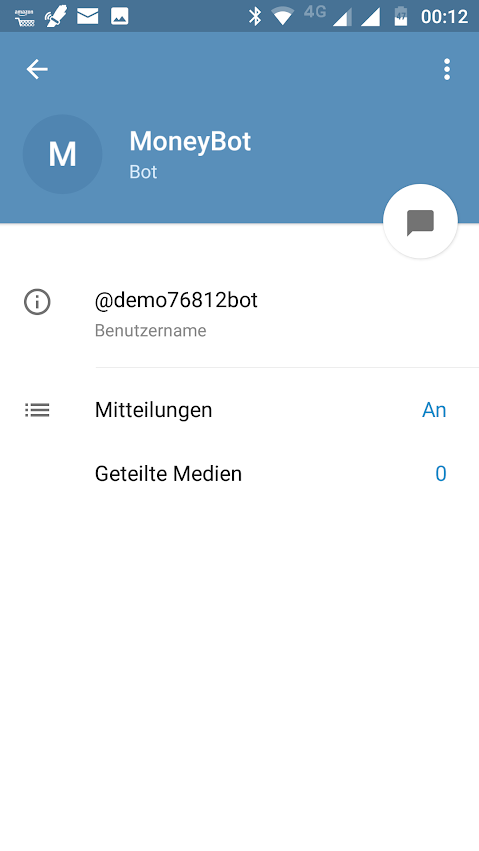
Since the BotFather has shared a link to your bot after it’s creation (t.me/demo76812bot), you can simply click on it in that message and are presented with a screen which looks quite the same as the one which was presented to you when you got in touch with BotFather.
Again, you need to hit “START” on the bottom to see an input field, but this time, you won’t receive any reply; no matter what you type here. To have some messages available for later development, you can write a few lines or send images to it already. There will be no reply, since there is nothing consuming these messages yet, but since the new bots are in a caching mode from the beginning, you will be able to pick up these messages, later (I’m not too sure for how long or what amount of messages the bots do cache; please do not write something too important, yet).
Go on – write some recognizable lines. We will grab them in the next part of this series.
Read what was received for your bot already
To get a list of “updates” (things received by your bot), you can open a web browser and open the following URL:
https://api.telegram.org/bot<token>/getUpdates
Make sure to replace “<token>”with the real token for your bot.
You should be displayed something like this:
{"ok":true,"result":[{"update_id":941430900,
"message":{"message_id":4,"from":{"id":265790798,"is_bot":false,"first_name":"Marc","last_name":"Richter","language_code":"de"},"chat":{"id":265790798,"first_name":"Marc","last_name":"Richter","type":"private"},"date":1533248344,"text":"Test"}},{"update_id":941430901,
"message":{"message_id":5,"from":{"id":265790798,"is_bot":false,"first_name":"Marc","last_name":"Richter","language_code":"de"},"chat":{"id":265790798,"first_name":"Marc","last_name":"Richter","type":"private"},"date":1533248578,"text":"Test2"}}]}
Awesome! So so far: Everything works! What you see here is a JSON reply, which is mainly the same format as Python dictionaries are represented in. And you can read it in the same way, too. But that will be the topic of the next part.
So far, you just need to understand this HTTP API is the way we will interact with the bot (not directly; we will use a module which does this for us in the background) and that this JSON is the way we will receive data from it; at least in this getUpdates – mode.
Once we have our Django interface ready, this will hit and trigger actions in our application in real-time without the need to actively poll the HTTP API for it. But this is a great way to get a feeling for how things work.
Outlook for the next part of the series
The next time, we will start to write our first demo-code in Python to interact with the bot a bit more. We will use telepot for this and do things like fetching the updates from the bot’s cache, send back a message to our mobile and so on. Also, we will learn a bit more about that JSON structure Telegram uses and what the single fields in there are doing.
I hope you enjoyed this part of the series! I’m looking forward reading any feedback on it.
Have fun!
Born in 1982, Marc Richter is an IT enthusiast since 1994. He became addicted when he first put his hands on their family’s PC and never stopped investigating and exploring new things since then.
He is married to Jennifer and a proud father of two wonderful children.
His current professional focus is DevOps and Python development.
An exhaustive bio can be found in this blog post.
